Template:Flametongue Totem strategy
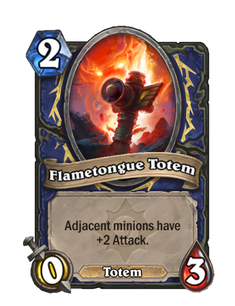
While the Flametongue Totem is almost valueless by itself, its effect grants up to two adjacent minions a sizeable boost in Attack. The best time to play it is when you already have at least 2 minions on the field to fully benefit from the spell by placing this card in between them. Ideally, place it next to minions which are ready to attack that turn, ensuring you have the chance to make use of its effects.
When placing the Flametongue Totem, consider the position of your future minion summons. Also note that all automatic minion placement, such as the shaman's ![]() Totemic Call power and
Totemic Call power and ![]() Feral Spirit, summon minions to the rightmost side of the board. When anticipating playing Flametongue Totem, try to place earlier minions such that the buff can be granted to the preferred targets.
Feral Spirit, summon minions to the rightmost side of the board. When anticipating playing Flametongue Totem, try to place earlier minions such that the buff can be granted to the preferred targets.
Like all on-going effects, this buff will be reapplied to whichever minions become adjacent to the totem. If an adjacent minion dies, causing another minion to become adjacent to the Totem, that minion will immediately gain the Totem's buff. Careful selection of attack order can in this way allow Flametongue Totem to increase damage dealt by several cards in a single turn. For this reason the Totem can potentially be especially effective when placed among several less survivable minions.
Similarly, it is possible for the Flametongue Totem's buff to be used by more than two minions per turn through careful summoning of Charge minions. Use the adjacent minions to attack, before then placing a minion with Charge immediately next to the totem. In this way the shaman can make use of the totem's buff several times over in a single turn, serving as a potent source of burst damage.
Flametongue Totem is very effective at transforming weak minions into giant-killers, such as turning a cheap 2/1 ![]() Murloc Tidehunter into a 4/1 capable of removing an
Murloc Tidehunter into a 4/1 capable of removing an ![]() Azure Drake or
Azure Drake or ![]() Booty Bay Bodyguard. This can allow the shaman to trade small minions for larger ones, or turn apparently unthreatening minions such as totems into sudden threats.
Booty Bay Bodyguard. This can allow the shaman to trade small minions for larger ones, or turn apparently unthreatening minions such as totems into sudden threats.
The opponent will generally want to remove Flametongue Totem as quickly as possible. For this reason it is best placed behind a Taunt, and is always best played when there are already two minions on the board, ready to attack. Ideally, summon and arrange minions the turn before, then place the Flametongue Totem the next turn, surprising the opponent. When playing against a Flametongue Totem, it is often more important to remove the Totem than minions it is buffing, since the Totem may continue to provide the same buff for freshly summoned minions on subsequent turns.
Opponents should consider carefully whether or not to allow the shaman to keep weak or even zero-Attack minions on the board. Totems are often placed in advance using the shaman's hero power, and are easy to ignore when they provide little reason to distract the player from attacking the shaman directly. However, Flametongue Totem can allow the shaman to trade these cheap and replaceable totems for the opponent's more powerful and expensive minions. This is almost always a good play for the shaman, since the totems can be easily and endlessly replaced.
This template contains Strategy content for these cards.
Remember that this is just an archived content of Strategy section that was supposed to be removed following the decision in Hearthstone Wiki:Project 13. It's up to you to review the content and keep them for a project in the future. Details to follow soon, once Project 13 is completed.

